
Colourful Vintage Bathroom Makeover with Wallpaper
After many weeks my vintage bathroom makeover is complete. It's been a long while since I have done much in the bathroom or blogged/photographed it. And I'm super happy with the result.

This is the last makeover back in March 2020. I had put down grey toned floor planks and redone the facing of the vanity with natural pine wood and lighted up the mirror frame to match.
Jump to now.

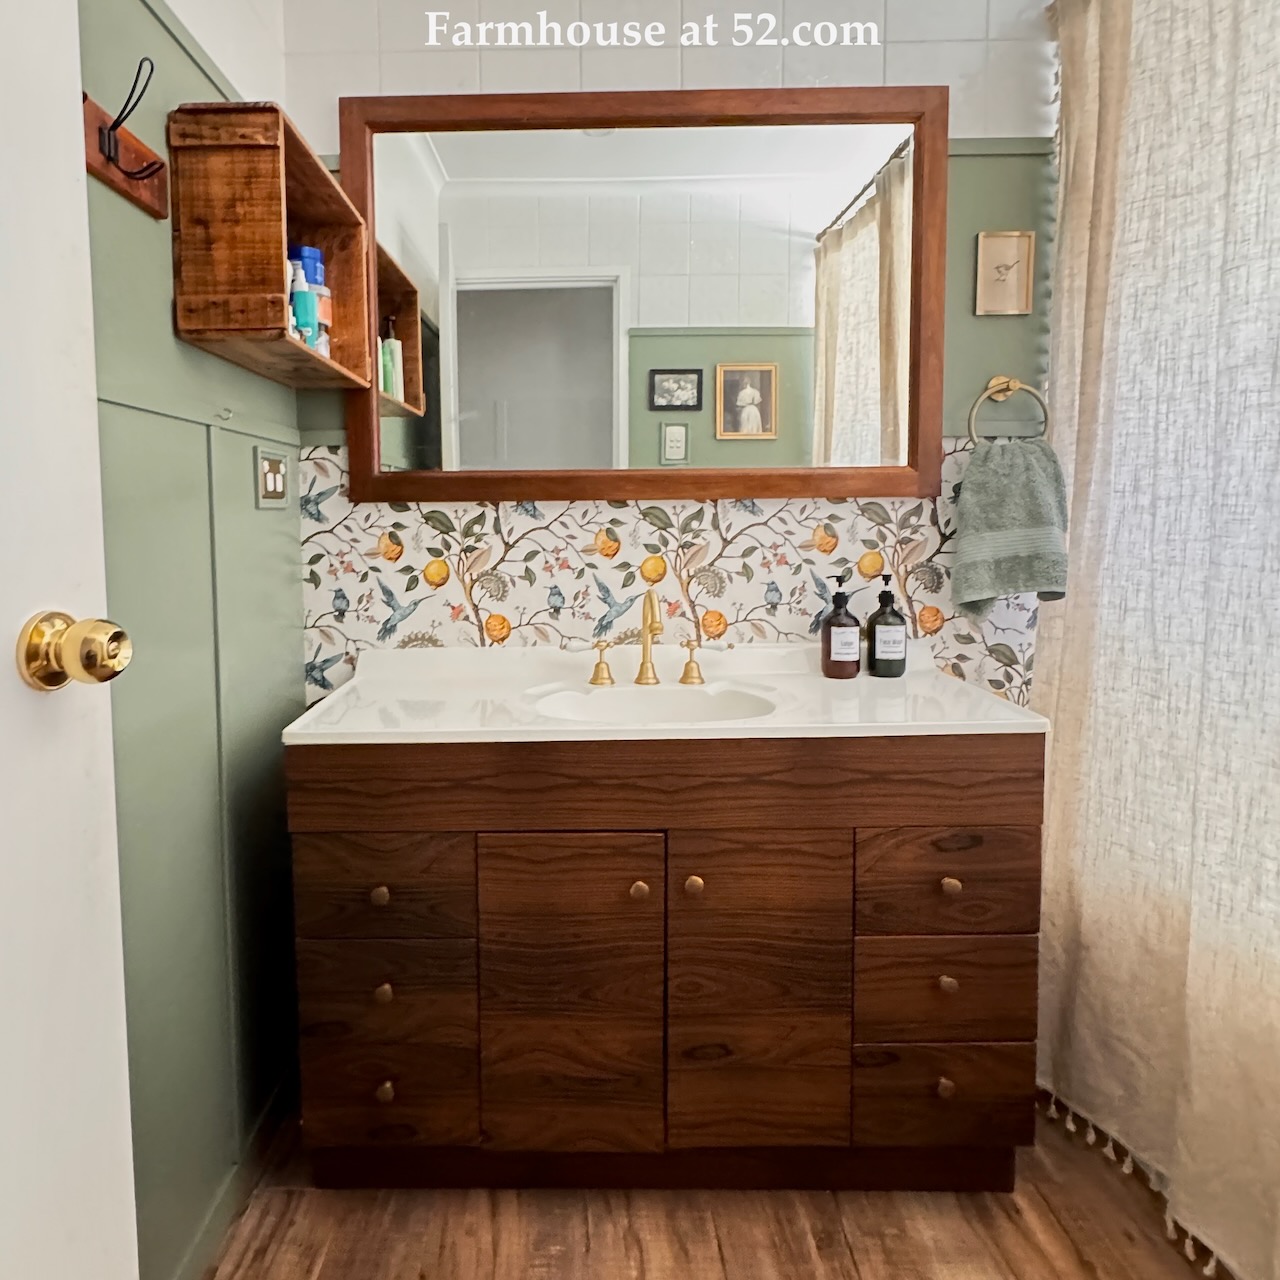
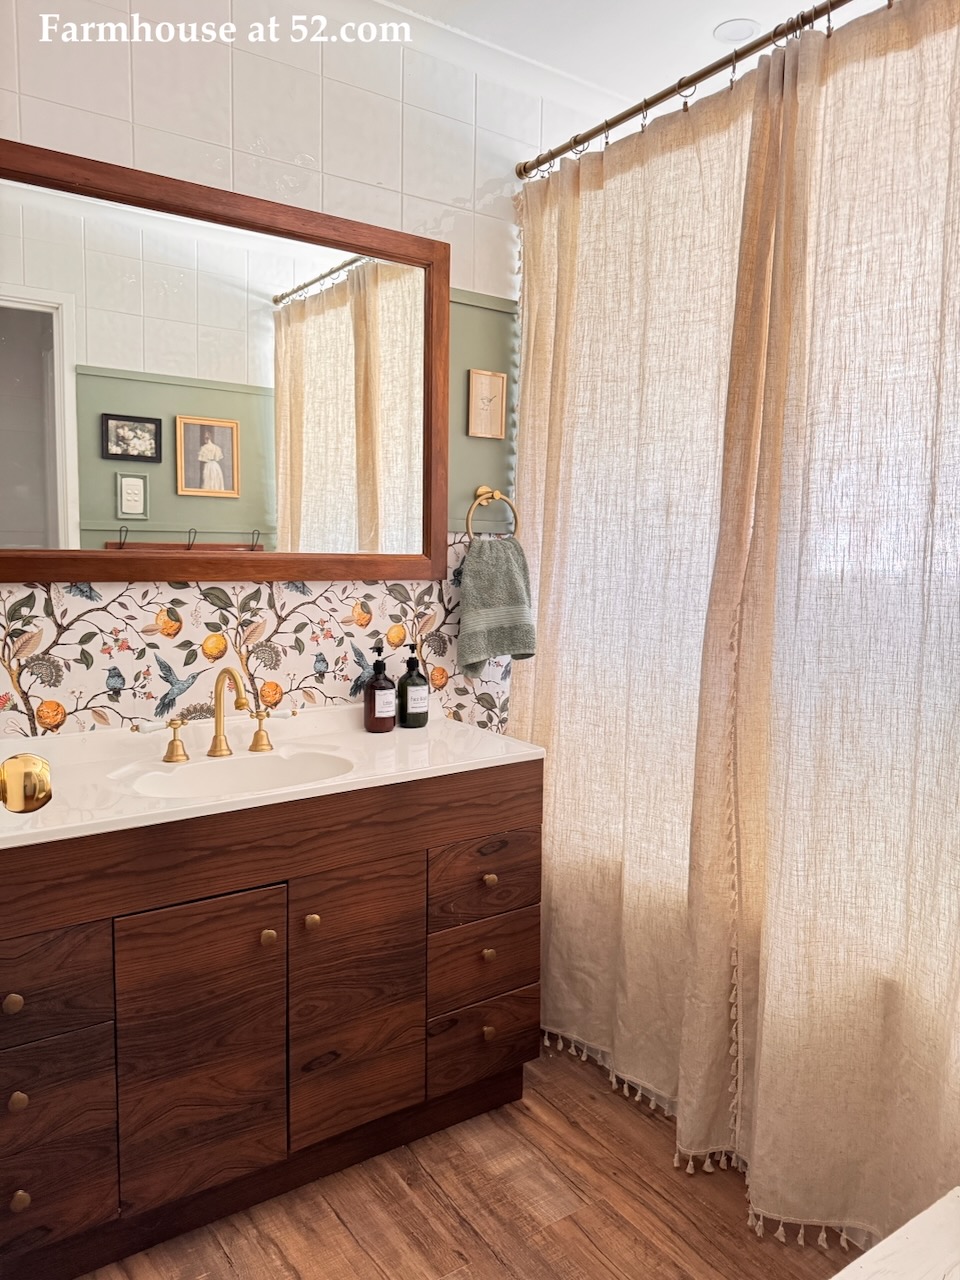
I guess you could say the first change was the vanity. I actually used wood patterned contact to cover the doors and drawers about a year ago. I had tried to stain the wood but it was very uneven. This option has been amazing. The contact has stuck well and they wipe clean really easily. And to compliment the dark brown wood tones and vintage vibe I added brass drawer and door knobs.
The gold tapware was also added to the sink about 4 years ago, along with matching shower tapware.

Next I redid the floors.

I used the same peel and stick ones as the toilet room.
And I love how they turned out. This time I remembered to stagger the planks, and butted them closer up against the tub and walls so there was minimal caulking.

After the floor I started the lower wall skirting to match the toilet room.

I used 66mm x 11mm x 2.7m moulding, cut to size and then painted in Porters Olive Grove green and sealed with Cabots Clear Varnish prior to attaching to the walls.

Next I used mdf sheets, cut to size and broken up with strips of vertical moulding for the walls.

I purchased 1 x 120mm x 240mm x 3mm and 1 x 120mm x 90mm x 3mm sheets of MDF for the lower parts of the walls. I had spare MDF to complete the top sections of the walls.

I also purcahsed 1 x 42mm x 18mm x 5.4m of pine moulding for the horizontal moulding.

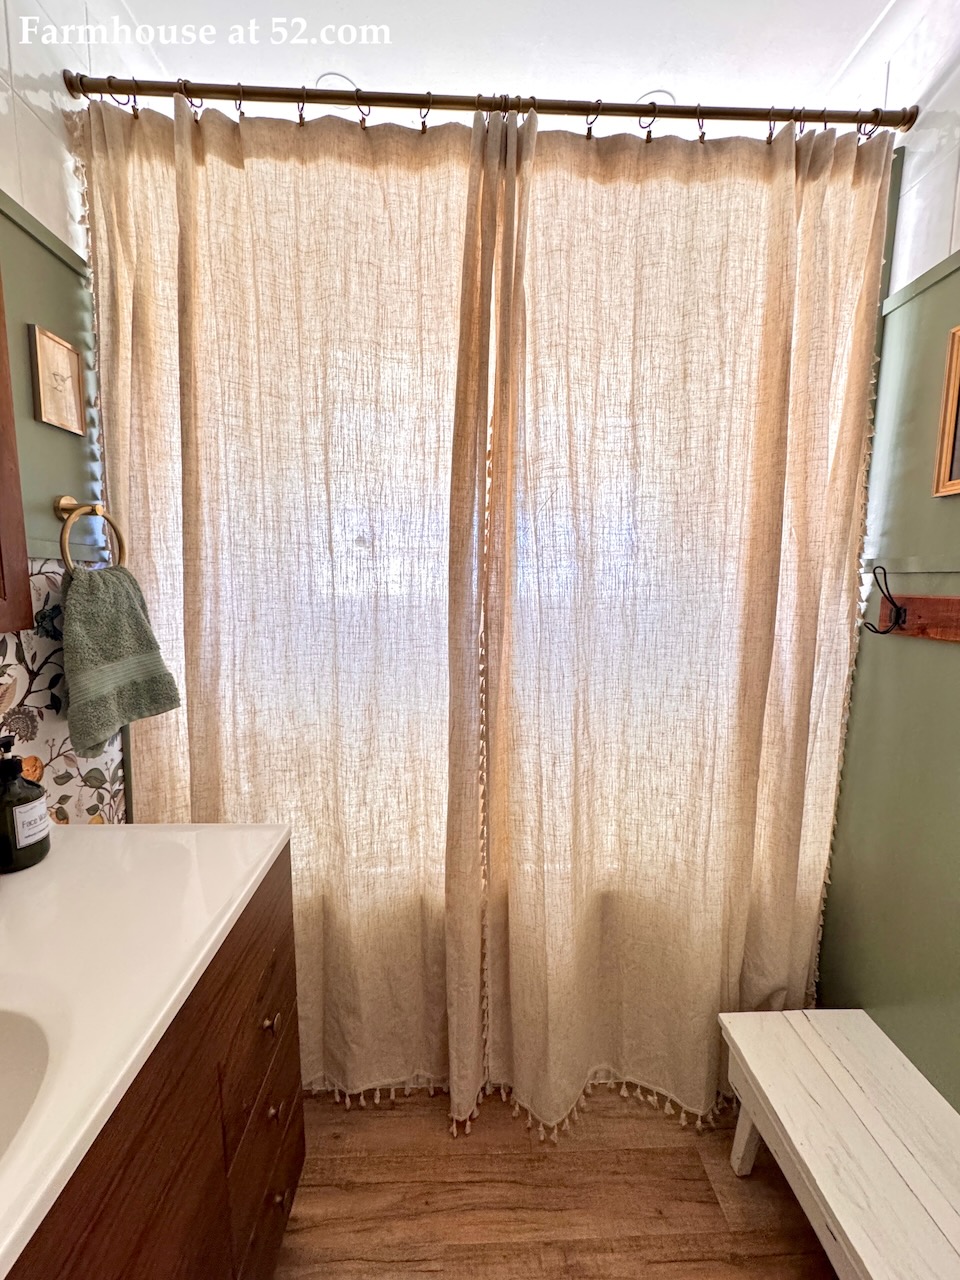
I kept our white painted vintage foot stool in the corner next to the tub, but replaced the towel hooks with more vintage hooks.

To this wall I also added some vintage prints.

I also framed out the light/fan switch with some pretty moulding, painted in the same colour as the walls.


I also used leftover moulding to frame out the sides and top of the shower frame.

On the adjacent wall I added the same moulding and sheet panels, as well as matching towel hooks.
I also added strips of vertical paneling to the walls to create dimension.

I needed 4 x 31mm x 8mm x 2.7m rounded moulding for the vertical paneling and to frame out the shower.
(Note to self - Apply Rub n Buff to door hinges in Antique Gold to match rest of the hardware.)
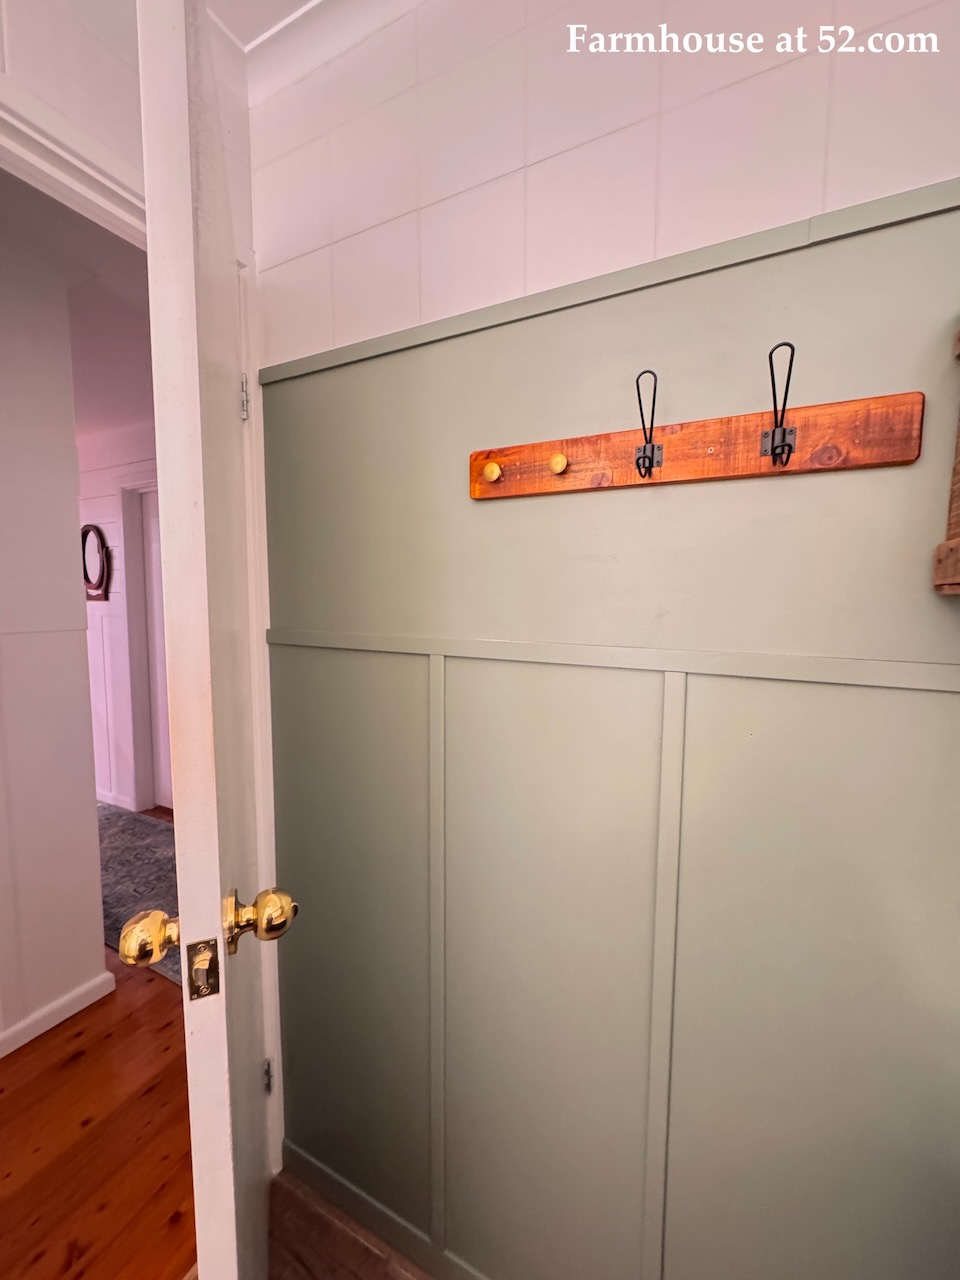
The hooks were a bit big to fit behind the door so I used small brass knobs the same as the vanity. These are great for hanging shower caps on.
I also changed out the door knob to a gold one.

I needed something to take all the family beauty product clutter off the sink counter and decided to use this old wooden box attached to the wall.

And to the power switch I spray painted the cover gold and framed it with more moulding to finish off and make it look more neater from where I cut the hole out of the mdf sheeting.


It's been just over 2 months of living with the new toilet room makeover and I truly still love it. It's the little touches like the moulding and matching gold and brass hardware that really bring both rooms together.

Materials Used
Floor tiles Peel and Stick from Bunnings - $80
Lower moulding from Bunnings - $14
Panel vertical moulding from Bunnings - $32
Top horizontal moulding from Bunnings - $12
Moulding for light switches - $10
Cabots Clear varnish for floor and walls from Bunnings - $34
Paint - Porters Olive Grove - 2 x $6 = $12
MDF sheeting - 1 x 240cms and 1 x 90cms = $26
Wallpaper from Temu - Left overs
Curtains from Temu - $50
Brass Curtain Rings from Amazon - ($18 for 40) 14 and 14 = 28 x 0.45 = $12.60
Gold and Bronze spray paint - On hand
Wooden towel rails - One on hand and other $25
Door Knob from Bunnings - $17
Old box shelf - On hand
Pictures - On hand
Total - $333.60
:) Julie

Comments
Post a Comment
Did you enjoy this post? Please leave a comment.