EASTER SHELVES INCLUDING DIY WHITE CARROTS & VINTAGE COTTON REEL BUNNY ORNAMENTS
Happy Thursday Friends!
How has your week been? I've had a pretty quiet week. No thrifty finds unfortunately, but I did get a lot of my Easter decorating done.

Today I'm sharing my shelves in the living room, all decorated for a Farmhouse style Easter.
I'm also sharing a few DIY's I created to add to my shelves including some cute white carrots and some vintage cotton reel bunny ornaments.

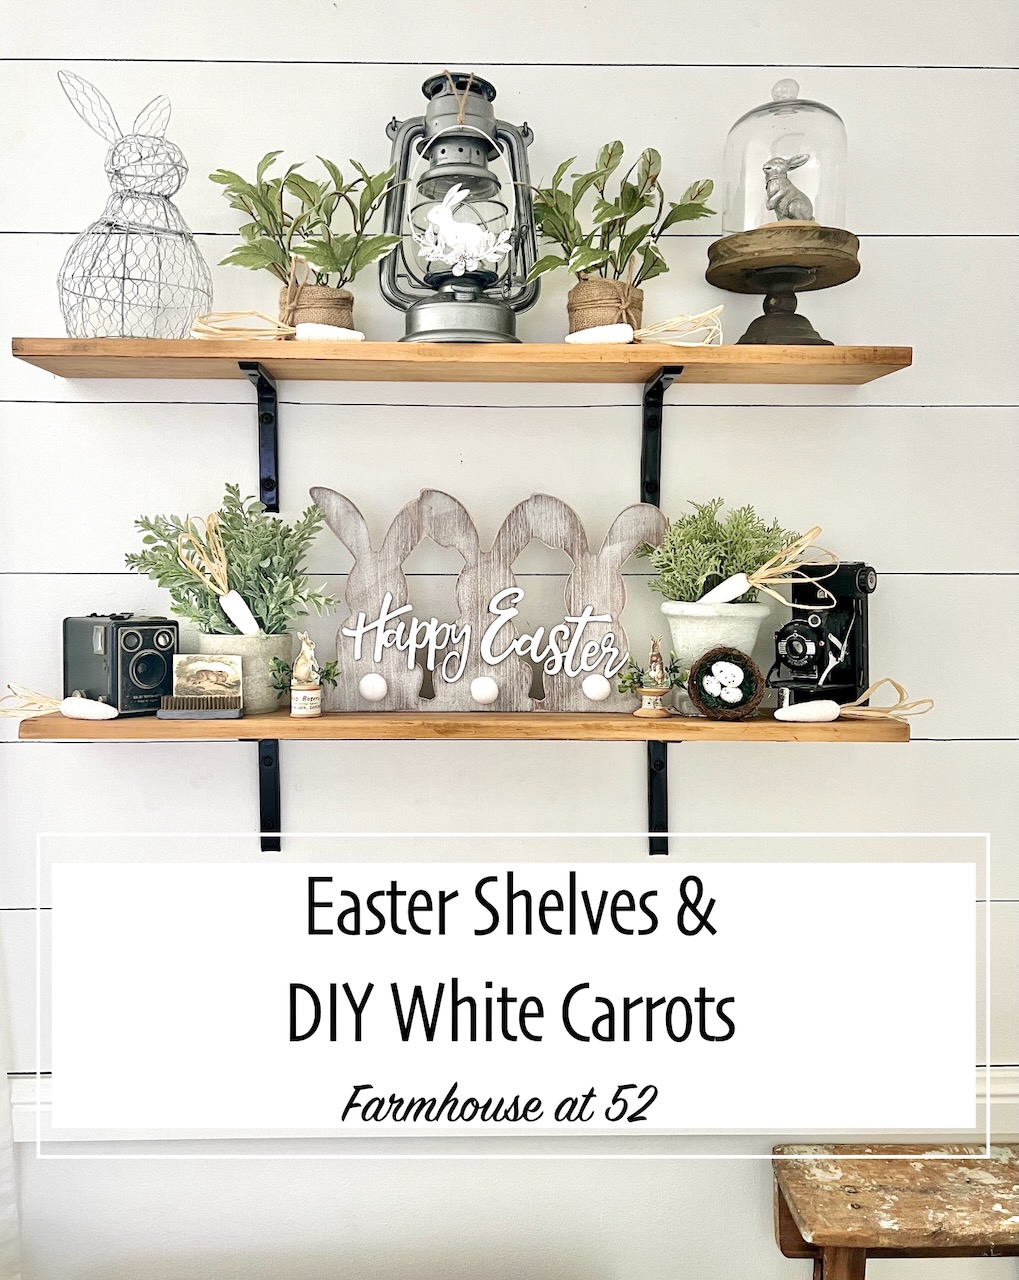
Let's start on the top shelf.
The cute little plants are a recent purchase from Kmart, on sale for only $3 each!
I'll go into how I made the carrots further down.

The white metal bunny hanging decoration is a recent purchase from Bed Bath n Table. They have the cutest Easter stuff there!

I've had this cute wire bunny for years. Another purchase from BBnT!

And this little silver bunny is also a recent purchase from you know where!

And on the bottom shelf I opted to keep my vintage cameras and potted greenery.

I found this little vintage rabbit graphic on the net and decided to print it out.

I love it sitting in my metal vintage flower frog.

And it wouldn't be Easter without a little bird's nest.
Vintage Cotton Reel Bunny Ornaments

I actually found this idea on Pinterest, but for the life of me I can't find the pin again.
The images are from The Graphics Fairy website. I printed them on cardboard, cut them out, leaving a piece to fold up on the bottom.
I then glued the folded piece onto the top of the cotton reel so the bunny stood up.

I hot glued a few sprigs of greenery behind the bunny.
And lastly I glued some old sheet music to the body of my cotton reel.
Pretty cute, hey?

And the cute wooden bunny sign is a recent purchase from Big W.
DIY White Carrots

I recently shared how I wrapped some carrots in macrame cord to make the white. These ones I did a bit differently.

I again used the orange carrots from Big W. I grabbed some flat white paint and painted straight over the orange string on the carrots. I needed 2 thick coats to cover all the orange.

After they dried I twisted out the green felt stems.

I had some decorative straw that I folded into a bunch.

The I twisted them back into the top of the carrot. I'll probably go back and hot glue the stems in properly later.

But in the meantime, I think they turned out pretty good!
In fact, I'm pretty happy with how my shelves turned out all round!
I'll be sharing a few other areas in our home soon!
Save It For Later
Did you find some Easter inspiration in this post? If so, don't forget to PIN it for later! Simply hover over the image blow and click on the Pin It icon in the top left hand corner.
Thank you for reading my post! If you enjoyed it, please let me know!
And for more inspiration, don't forget to sign up for my email alerts. Sign up here!
Take care and stay safe,
Julie
Comments
Post a Comment
Did you enjoy this post? Please leave a comment.